|
Air's Rock Interior
Items::
Elixir,
2 Vials,
Clarity Circlet,
666 coins,
Psy Crystal.
Here are all the Airs Rock Interior maps in order of appearence, if you follow the walkthrough. The "Main Room" will appear throughout your journey so it is not placed in order.
|
Click here to view
the map
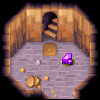
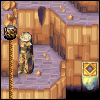
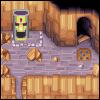
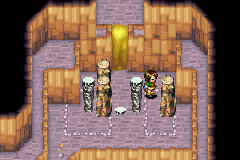
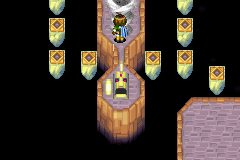
Inside, take the Psynergy Stone. Go south. Ignore
the splitting path and continue south. Follow the path until
you go to the next room. Here, continue following the path and
you will reach a staircase leading you to another floor. |
|
Click here to view
the map
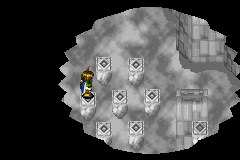
In floor 2, go east to the next door. Follow along the path
and go straight east into the door. Follow the path to east
and climb down the ladder. Go up a little and you see a puzzle
with 2 squares. Go up to the square with 2 wooden pillars
and 1 gray pillar. Move the most western brown pillar to the east twice,
and north once. Now move along to the other square. Pound the gray pillar here, and
move the wooden pillar onto the pounded
pillar. Now, climb back up and jump on a wooden pillar. Go
south, east, east, and east onto the ledge. Walk south, climb
down and jump across the floating platform to the platform
with an air rock. Use Whirlwind. Now go all the way back down
to the puzzle and go through the cleared path. Go to the north
of the air rock and face south. Use Whirlwind. Go back up
where you climbed down (the ladder). Head south, through the
cleared path, then follow it to the next room.
Climb down and move the pillar all the way
west onto the square. Climb back up, and go back to where you climbed
down to the puzzle. Go north, follow the path, through the
previous door. Go south, jump onto the pillar, and onto the
ledge on the west. Follow the path to the staircase.
|
 |
|
Click here to view
the map for the first 2 paragraphs
Click here to view
the map for the last paragraph
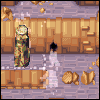
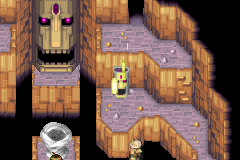
In floor 3, go north. Climb down the ladder
where you see a steaming hole. Go to the east and climb up.
Follow the path that turns north and into the next room. Go
north a little and move the pillar to the east. Now go past
the steaming hole and go north. Follow the path to the east
then north. Climb down the ladder and go west under the pillar.
Use Move to move the pillar to the right. Now walk inside
the rocks. Standing one step east to the steaming hole and
facing west, use Move again to move the pillar back west.
Climb up and jump across the pillar. Follow the path to the
west and south through to the next room.
|
 |
|
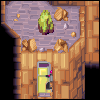
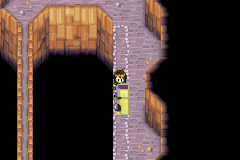
Go south and climb down. Push the pillar
onto the square. Climb up using the ladder just north of the
pillar. Go south along the wall. Here push the pillar onto
the square. Now go back north along the wall. When you see
the pillar you just moved, jump across it to the east ledge.
Go south. Push this pillar one step east. Slide down and go
west. Climb up here and go north through the gap south of
the steaming hole and rocks. Walk along the rocks and exit.
|
|
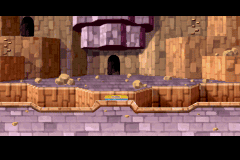
| In the main room, go
west and jump across the gaps. Enter the door. Go north
then west. Climb down. Stand on
the right of the air rock and face west. Use Whirlwind. This
turns the wall horizontal. So climb back up, and walk
across it. Climb down while you've reached another side. Walk
west a bit and climb up. Go west and keep following along
the wall. You will reach a ladder. Climb down. Use Whirlwind
to turn the wall vertically. Now follow the path you just
used to go back where you climbed the ladder. Take the path to
north. Follow the path and cross the rope. Push the pillar to
east and down. Go back west via the rope. Walk on the moving
wall and cross another rope to south. Follow the path west
to a staircase. |
 |
|
Click here to view
the map
In floor 4, follow the south wall to the west and you will
get an elixir. Go back and when you see a path going north,
take it. Go all the way north. Climb down and go east. Jump
across all platforms on to a stage. Jump south twice, and
walk east, then jump south and east. Climb up the ladder and
go east then south. Follow along the wall and jump across
the gap. Climb down the ladder and stand south of the air
rock. Use Whirlwind. This turns the moving wall vertically. Climb
back up the ladder, and head north. When you reach the end,
take the rope leading east. Go south and climb down. Stand
to the right of the air rock and use Whirlwind. This turns
the wall horizontally again. Climb back up and walk across
it. Walk until you are blocked by a rock. Face south and
jump onto the pillar, then onto the rope. Walk south and follow
the path until the end.
|
 |
|
Click here to view
the map
In the main room, jump across to the east
and climb the ladder. Ignore the first ledge you see, keep
going down. You cannot go to the floor 6 now, keep climbing
down. Go north and through the staircase.
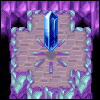
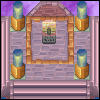
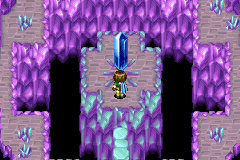
You are in a shiny blue room. Go south and
when you can go north, take the way. The crystal in the middle
can restore your PP. After getting charged up again, follow the path to the next room.
|
 |
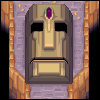
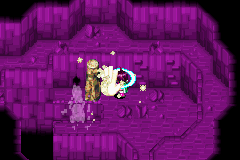
| Now you are in the middle of the
main room. Go down the huge statue face and jump onto the floating
platforms. Jump south and you will reach a pink tornado. Use
Whirlwind. After the statue is awakened, jump back onto the
platforms until you get to the most northern one. Jump east
to the ledge and jump onto another column of platforms. Jump
south and get outside. Here push the pillar once onto the square. Now go back to the interior.
Go back to the other column of plateforms and ride the tornado spitting statue beneath the big tornado. |
 |
|
Click here to view
the map
Here, use Whirlwind to awaken another statue. Jump to the west,
use Move to push the pillar out of the way. Jump onto the
ledge and push the pillar one more time. Jump south twice.
Now go east and north to find a statue creating small tornado.
This will lead you to a treasure chest. Inside it is a vial.
Go north and use Move to move the pillar aside. Continue moving
it until it is moved onto the square. Jump across, go south,
and follow along the wall until you get to a door.
|
|
|
Click here to view
the map
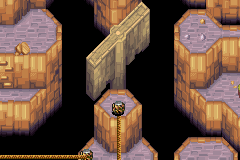
In the main room, go left to the door. Go
north passing the statue. Climb down and go west. Push the
pillar onto the square. Go back east and up and walk back
to the statue. Ride a tornado. When you land, go east and
jump onto the pillar. Jump to north to the door. In the next
room, go north and when you see a yellow statue, push it up
till the end. Go west and walk onto the narrow path and ride
a tornado. You will be carried to a treasure chest. Take it,
then slide down. Walk around along the ledge, then climb up.
Jump to the east and go up to the statue. Push it south either
4 or 5 times. Ride on a tornado again. Walk south into the
previous room. Here push the pillar down onto the square.
Now go west and follow along the wall until you see a floating
platform. Jump: east onto the floating platform, south, walk
south, east, walk east, south, walk east, east, east, walk
north, north, north, and walk up to the pillar. Use Move to
move it onto the square. Now jump back to the ledge through the floating platforms. Walk
all the way back to the pillar you pushed down by following
along the wall. Here, go south then west. The steaming hole now
has no steam to block your way. Take the staircase.
|
 |
|
Click here to view
the map
Click here to view
the map
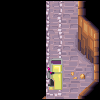
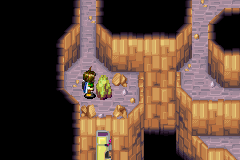
In floor 3, climb down and go east. Take the
southern part and walk across the rope. Go south and walk
on another one. Climb up and walk on the third one leading
south. Go south and take the staircase. In floor 4, immediately
turn west and follow along the wall until you see an air
rock. First, stand in the left and face east. Use Whirlwind.
Now stand north of it and face south, use Whirlwind again.
This will blow down the statue. Now go back to the entrance by following
along the wall. Go south then east, and climb down the ladder.
Walk south-west until you see a narrow path. Don't take it yet,
but go west instead. Climb up and ride a tornado. This will
lead you to a treasure chest with 666 coins in it. Slide down
the slope and walk south using the narrow path. Go through
the staircase.
|
 |
|
Click here to view
the map
In floor 5, it is easy enough to go through:
go west until the end and don't take the first path you see.
Go north and jump across the platform. Take another Vial.
Go north till the end. Use Move to push the statue to the
east. Now go all the way back to the entrance. Take the other fork this time and go north.
Exit this floor. The
next room is easy enough to get through.
|
 |
In the main room again, climb down the ladder. Ride
on a tornado. Climb up the ladder. Jump across all platforms
and you will enter the sanctum.
|
Click here to view
the map
Inside, just simply jump north. You will eventually
see a tablet. Examine it and Sheba will come out to learn Reveal. Now go
to the west and jump across the platforms. When you reach
a place with a circle of platforms, use Reveal. Jump across
and you will get a treasure chest. Go back to the stage and
go east this time. You will be back at the entrance.
|
 |
|
Click here to view
the map
Now it's time to get a summon tablet. Use
Retreat to go back to the entrance. Now jump over some platforms and
try to make your way to the center, where the small statue will
blow you up. You will be back to floor one. Go west then climb up the
the stairs. In the main room, go to the eastern door. Follow the
path and don't take the first fork: go south and
jump across the pillar. Follow the path into floor 3. Here,
follow the path and go down the ladder. Go east and climb
up. Follow the path into the next room. Push the pillar aside
to stop the steaming hole. Walk through the opening, and go south through a door. You will
see a pillar. Move it to east one step from the wall so that
it won't stand by the wall.
Go back into the room and go north. Follow
the path and climb down. Move the pillar east, then go within
the rocks and stand east of the steaming hole. Move it back.
Climb up and go further west. In this room, ride a tornado.
Make your way north of the air rock and face south. Use Whirlwind. It
will blow a pillar to just where you need it. Slide down,
climb up the western ladder, and jump across the pillar. Go south
and slide down. Climb up the western ladder. Go south then east.
Push the pillar. Now go get a new stone tablet that combines
Jupiter and Venus Djinn. Retreat, go outside and Retreat
again to leave.
|

|
|