|
Aqua Rock Interior
Items:: Vial,
Crystal Powder,
Water of Life,
Lucky Pepper,
Rusted Sword
Click to see the full image:
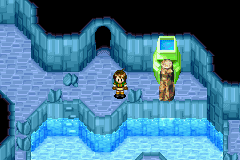
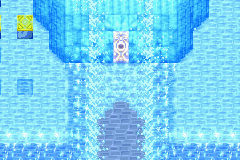
| You are inside Aqua Rock Interior. Go south to the next screen into floor 1. |
|
Click here to view
the map of floor 1 (full size)
Click here to view
the map of floor 1 (shrunk)
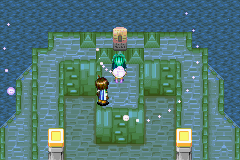
Here, heal your members and take the psynergy stone. Head east,
jump onto the platform, then jump south, south, east, east,
north, north onto land. Go to the next room. Here head
north into another room. Go north to the pillar. Push it once
and let it block the steaming hole. Walk east and pass it, then
stand right below the rock on the top level. Use Move to pull
the pillar towards you. Face the second pillar. Pull it towards you, then go around it and use Move to push it. If you push it normally you will get pushed down by the jet. You are now free to head east. Climb
the ladder and go west to open a treasure chest.
|
 |
|
Head back down the ladder and go south into the next room.
Go south and Move the pillar to block the statue. The water
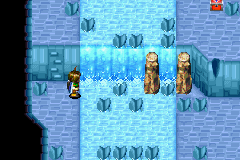
below will dry up. Climb down the ladder and Frost all three
puddles of water. Climb back up and jump across them. Go south
into the next room.
Follow the corridor until there is a split.
Head south and follow the corridor to the end. Jump across
the gap then the platform. Through the door, you will reach
another treasure chest.
|
 |
|
Go all the way back to where the path split.
Go north this time. In the next room, walk along the south
wall into another room. You are back in the first room. Jump
across the platforms, and use Douse on the water drop statue.
A blinking path will appear. Follow it into the next room.
|
 |
|
Go north and take the west path when the path splits. Head north and jump across the platforms. Go north and jump across another platform. When you see a pillar, use Move to push it to block the steaming hole that's the farthest away from you. Go east and let the steaming hole push you south. Jump across the platforms to the east and follow the corridor into the next room. Here, climb down the ladder. There are three pillars. Go to the north-eastern one. Push it one step east then one step south. Go back up, use Douse first on the face statue, then on the water drop statue. Walk onto the blinking path. Go through the remaining corridors (which is easy) and it will lead you to floor 2. You will know you're in a floor 2 when you pass a purple room.
|
 |
|
Click here to view
the map of floor 2 (full size)
Click here to view
the map of floor 2 (shrunk)
Go south and climb down. Walk south until the end. Jump across
the platforms. Head west, climb the ladder, head south and
enter the next room.
In the big waterfall room, walk into the current
and run to the west. You should cross the stream. Go all the
way to the south until you are standing north of the ladder.
Head north a little, until you pass a rock on the land on
your right. Walk into the stream north of that rock, run east
pass the first rock in the stream. You will drop down the waterfall but you won't go any further because a rock will stop you. From there, use Move to push the pillar. Run back to
the land.
|
 |
|
Climb back up, standing in the same place
again, this time run all the way to the east. You will be
washed down onto the pillar. Jump across them, and take the
treasure chest, then slide down the slope and head to the east through a staircase.
|
 |
|
Click here to view
the map of floor 3 (full size)
Click here to view
the map of floor 3 (shrunk)
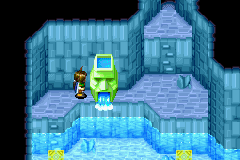
In the floor 3, jump across five floating platforms and jump south. Go west then north into the next room. Here, climb down and walk north-west to the ladder. Climb up and use Douse on the statue. This will cause the water to rise up. Jump across the platforms to reach east of the statue. Go north into the next room. Here, head west and jump across one platform. Go south into the next room.
|
 |
|
Climb down the ladder. Push the blue rock one step to the
west. Go west and use Frost on the puddle of water. Climb
back up and use Douse to fill the statue. Jump across the
platforms and an ice pillar to the west. Take the Water of
Life in the treasure chest. Now jump all the way back and
exit the room.
Enter the room again and everything is reset.
Climb down and push the rock all the way to the west. Climb
back, fill the water again and jump across the platforms to
the door. Here, go north and jump across the platforms. Push
the pillar onto the circle. Jump north and enter the door.
Here just push the pillar onto the circle then climb up, jump
to the north and enter the staircase (not the door, the staircase).
|
 |
|
Click here to view
the map of floor 2 (full size)
Click here to view
the map of floor 2 (shrunk)
In the floor 2 again, walk across the rope. Climb down and
go east then south to the end of the path. Jump onto the platform to the south and
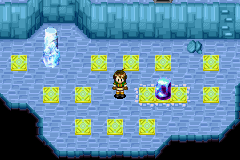
enter the next room. Here is hard to describe how to push
the pillars into the right place. Climb down the ladder. First,
there is a pillar in the north. This is the 1st row. South
of it is a sequence of pillars, two of them cannot be moved. This
is the 2nd row. Two more are standing in the south. This is
the 3rd row. All pillars are sorted from left to right.
1) Go to the 2nd row, 2nd pillar. Push
it all the way to the north-east corner;
2) Go to the 2nd row, 2nd pillar (it is now the one to the left of
the fixed pillar). Push it 2 steps to the left;
3) Go to the 2nd row, 4th pillar (the one between two fixed
pillars). Push it all the way to the south, as well as west a bit, so that it is
vertically parallel to the 2nd row, 1st fixed pillar and horizontally parallel to
the 3rd row, 1st pillar.
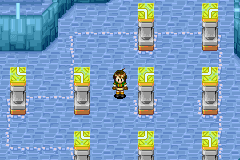
Now you are done. If you need any additionnal help refer to the screenshot. Now Douse the face statue then Douse the water drop statue.
Walk across the shinning path and through the door. Then go through a staircase.
|
 |
|
Click here to view
the map of floor 3 (full size)
Click here to view
the map of floor 3 (shrunk)
You are in floor 3 again. Push down the pillar and walk across
it. Enter the door you see. In this room, go north all the
way to the end. Jump across two platforms, jump south onto
the ledge, then jump across one more platform. Head north,
and if you wish, you can head east to fight a mimic. It's
just another easy battle. Standby all your Djinn except Mars.
|
 |
|
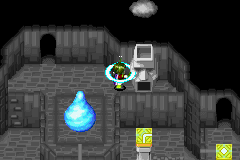
After that, head west until you enter the next room. It is the crystal room again. Go south and jump across the platforms to the south. Click on the big crystal in the middle of the room to have your PP restored. Head through the door and you will see a big pool. Use Douse on the water drop statue. Head directly west to get a Lucky Pepper.
|
 |
|
Go back east to the water drop statue. Go east and follow
the blinking path until you've reached the final section of
the blinking path. Jump south, then jump west twice. You should
land on the middle stage. Go south and climb the ladder. Take
the jewelry you see. Go back to the blinking path last sector
and cross it to the east.
|
 |
|
Now go south and climb down two ladders. Take
the western door. Walk along the edge of the pool with face
statues and platforms. Jump on to the fourth platform from
the right. Go north and go through the door. You are back
in the main room. Go north, and put the jewelry you got earlier
on the stand.
|
 |
|
Click here to view
the map of the sanctum
This will cause the water to split a dry path for you. Go north and through the door. Find your
way to the north. You should see the same thing as in Air
Rock and Gaia Rock. Piers will come up and learn Parch. After
that, the lower level will up with water. Use your newly learnt Psynergy to dry it up.
|
 |
|
Click here to view
the map of floor 3 (full size)
Click here to view
the map of floor 3 (shrunk)
Head back to the main room. Continue going south to the room
with two face statues. Jump across the platforms, then go east.
Go north through the door. In the main room, go north
and climb two ladders. When you can, turn east then south
through a door. In the room with a stream, climb down the
ladder. Turn east and find your way north a bit. Run
across the stream. Climb the ladder, go north and climb another
one. Stand near the statue and use Parch.
|
 |
|
Now go back south and climb down the two ladders.
You can now walk north to the Djinni. Be prepared.
Battle:: First, exchange all Mercury
Djinn with Sheba's Jupiter Djinn. Standby all Djinn except
the Mercury. This Djinni has strong water Psynergy that can
chomp off half of your HP. But don't worry. If you use level 4 summons,
the fight can be finished in the first round.
|
 |
|
Click here to view
the map of floor 1 (full size)
Click here to view
the map of floor 1 (shrunk)
After you get the Djinni, go south. Go to the very south so that you can reach the south-eastern door. Here climb down the ladder, follow the corridor to the next room. Immediately turn west and use the south-western door. In the entrance room, go to the very south where you see a treasure chest underneath the water. Use Parch. Climb down and get the treasure. Go south and climb up another ladder. Go south to exit. You are outside again. Use Retreat to the entrance. Leave.
|
 |
|