|
Dehkan Plateau
Click to see the full image:
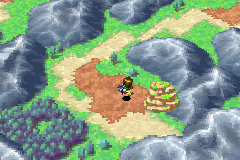
| Outside the Shrine of the Sea God, walk back west where Daila is. Walk south a little and when the path splits, take the eastern path and follow it. Go past a bridge, then walk south and pass another bridge that leads west. Keep following the path, and you should soon reach Dehkan Plateau. |
 |
Click here to view
the map
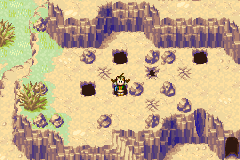
Walk up three staircases. Here you will encounter some soft soil. You can safely step on the closed cracks, but it will be weakened as you step on it. These weakened cracks will make you fall into the room below if you stand on it. The weakened cracks block your way and you have to jump over them. You cannot fall into the open cracks.
Walk on to the cracks and make yourself fall. In the room below, take the south door. Climb down the vine and grab the treasure chest. An "Full Metal Vest" is inside (defence: +21). Go back up and into the previous room. Take the northern staircase this time. You are back up. Go east to the next screen.
|
 |
Click here to view
the map
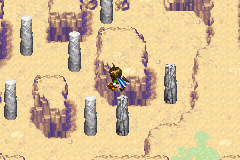
On this next screen, you will see some gray pillars. These grey pillars crack when you jump on them. If you jump on them a second time, they will break and cause you to crash to the ground.
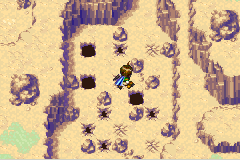
Take the north-most pillar to get an elixir. Jump back and the pillar will collapse. Climb back up the ladder and jump across the 2 pillars. Walk south and follow the path until you see a wooden pillar. Ignore it and go north. Here is a cracked-ground puzzle: starting from the south where a closed crack is between 2 rocks, walk up one step, step on the western closed crack. Turn north. Walk up north and jump across one open crack. Go east until a rock blocks you. Step on the southern closed crack. Walk south for one step, then turn east. Jump across the hole. Walk north along the east cliff. There's one more closed cliff to walk through. Go north to the next screen.
|
 |
Click here to view
the map
Go up and jump across the one pillar you can jump on. From here, jump across, then jump on the western pillar. Jump north. Jump onto the eastern pillar. Jump back, then jump on it again to make it collapses. Climb up the vine and get the Thermis' Axe (attack: +30).
Go back up and exit to where you came from. Come back. Jump on the pillar, but this time take the southern pillar. Jump to another one and onto the ledge, and jump to another pillar and onto another ledge. You should now be at the complete western end of the map. Walk up. Ignore the first pillar you can jump to, but rather jump on the 2 consecutive pillars, then go north onto a ledge. Now jump on the remaining pillar, and go north, following the path to the next screen.
|
 |
Click here to view
the map
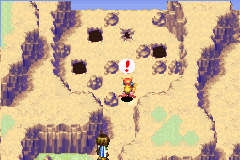
The next screen is pretty easy. Follow the path until you see another puzzle. Purposely fall through one of them. Take the underway and you will soon meet a Mars Djinni named Cannon. When it spots you, it will run away. Follow it and fall through the crack. Follow the path until you are out again. Go south and climb up the vine. The Djinni will run away, once again. Follow it to the next screen.
|
 |
Click here to view
the map
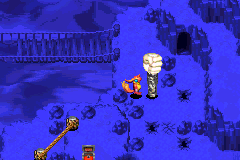
The Djinni is now on the broken bridge. Ignore it and go south. Climb down a vine and cross 2 ropes. A wooden pillar with vine on it will be in front of you. Push it east until it reaches the end. Climb up and jump onto the ledge. Use Lash to connect the rope and get a nut. Climb back down the Lash rope, and down the vine on a pillar. Push the second pillar to the lower ledge. Climb down. Go to southeast and climb the vine. The Djinni will spot you. It will Pound a pillar and run away again. Follow it to the next screen.
|
 |
Click here to view
the map
As you make a few steps in this screen, the Djinni will spot you and run away, cracking all pillars on its way. Climb down the vine. Push the wooden pillar to the east twice. Climb it and jump onto the ledge. Jump on the eastern pillar, then jump fourth, then back to make it crumble down. Go north, then go all the way around until you reach a pillar with vines tangeled around it. Move it towards the cracked pillar. Climb up and jump onto the cracked pillar. Climb the vine you can now reach. Push the pillar to the lower level. Go back down, and Move that pillar you just dropped to the west. Go back up, jump onto it, then jump to the ledge. Go into the cave.
|
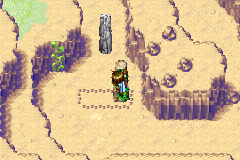 |
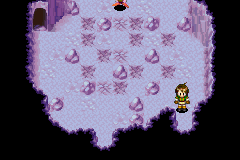
Simply walk through the first room. Second room contains a puzzle and the Djinni. Don't go near the Djinni, but instead make this move: move to the west, step on the first closed crack of the first column of cracks. Turn north and step on the next closed crack. Turn east and step on the next one. Turn south and step on the next one. Turn east and go all the way to east. Go through the door.
|
 |
Click here to view
the map
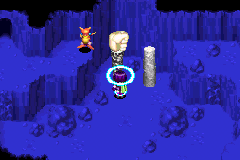
Go up the next floor and you will find yourself outside. Go north. When you see 3 cracks, take the east one. You will fall on the Djinni, who will drop the Pound Cube in surprise. Take it and follow the Djinni. Go through the next room, and you will find the Djinni again. Don't approach it right away. Instead, climb down and use Pound on the dark pillar. You have now trapped the Djinni, and he has no escape route. Move in on him, and prepare as the Djinni struggles for its last chance.
Battle:: Unleash your Djinn on it for the first round. On the 2nd round, use your strongest Psynergy and it should finish this fight.
Climb down the vine, and go up another vine. Go through several doors. When you end up outside, go down the stairs and head south to exit Dehkan Plateau.
|
 |
|