|
Treasure Isle
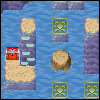
Click to see the full image:
 |
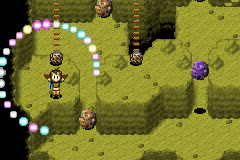
Treasure Isle is located in northeastern part of the world. To reach it, don't forget to Teleport to a nearby town, it's quicker. Treasure Isle is northeast of the Continent of Angara. You should sail to the north of the island and go counter clockwise along the rocks. There should be an opening that leads to a beach. |
|
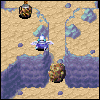
Click here to view the map
Enter the cave. Go north then turn west. Go to the third cave
and take some items.
Go back east and go north through the door. Here, jump all
the way to the north and you will step on a red switch. Rocks will appear and block your way. Ignore
the first two rocks as they lead to empty treasure chests.
Use Grind on the eastern rock and it will sink. Jump all the
way to the east and go south, entering the next room.
|
 |
| Here, jump south a whole bunch then
east twice. Walk counter clockwise along the rocks and jump
north. You will eventually land on the same ledge. Move the
pillar south, avoiding the button on the ground, to the east, then up one, so it's beside
the switch. Jump back around to the other side and face the pillar. Use
Move to push it onto the switch. Go clockwise along the rocks
and climb up the ladder. Walk across the rope and follow the route to enter the next room. |
 |
| Here, jump north and
you will step on a red switch. Jump east to the end and use
Grind on the eastern rock. Jump north, climb the ladder and
walk south across the rope. Jump west and take an Jester's Armlet. Go
all the way back to the rope and walk across it. Climb down
and jump west. Use Move to push away the pillar. Push it one
more time and jump north on the remaining platforms to reach the next room.
In this room, go west then south. Go to the
west end. Go north to fight a mimic, if not go south to the next
room. Here, jump south across two platforms and move away
the pillar. Jump south on the platform, then jump west. Climb the
ladder and jump west. Open up all the treasure chests here. Now go all the way back to the previous
room.
Here, go east then north. Continue north and
follow the corridor into the basement.
|

|
|
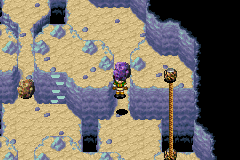
Click here to view
the map of the basement
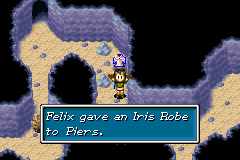
In the basement, go south then west and use Lift on the rock. Go north then west and take the robe. Now go south then west and eventually you will see another rock. Lift it and enter the next room.
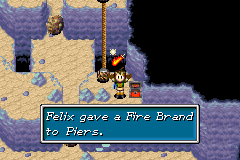
Here, go north and Lift the rock directly in front of you. Go north and climb the ladder. Jump east and walk south across the rope to get a sword. Go back to the ledge with the ladder.
|
|
| Jump west onto another ledge. Go west and jump west past the rope. Jump west again onto another ledge. Walk across the rope to the south and get a Djinni. Now go all the way back to the previous room.
In here, go north and enter the room again. Go west and Lift the western rock. Go north and Lift another one. Go east and jump across two gaps. Go south and Lift the rock. Jump west and climb the ladder. Jump west and walk south across the rope. Go east and jump across two gaps. Climb down the ladder. Take the northern door.
|
|
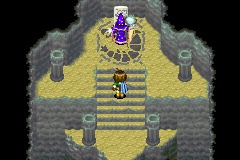
| In this room, go north and ignore the splitting path. If you did not transfer your data, follow the corridor and you will get a Venus Djinni. Now go all the way back south to the splitting path. Go east and follow the remaining pathway. Before entering the next room, save your game and be prepare for a tough boss battle.
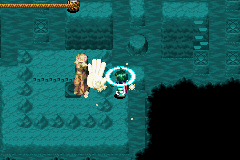
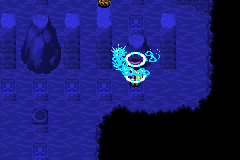
Battle:: In this room, you need to fight a
Water Guard. He has psynergy that can chop off half of your
HP. But the most harmful thing in this battle are the balls around him,
and he can summon replacements if they are defeated. The four
balls are:
Purple ball: Thunder attack.
Green ball: Create a strong barrier on the Water Guard.
Red ball: Explosion attack.
Blue ball: Recover Water Guard over 1000 HP.
The green and blue balls are highly annoying
because you can only do tiny damage on Water Guard if green
ball creates a barrier on him, and the blue ball will recover his
HP almost every round. The purple ball has less damage on
you. The red ball will explode itself once. Get rid of the
green and blue balls and best leave the purple ones. The most
effective attack is Felix's and Isaac's Super Ragnarok. You
need a strong defensive curing member in your team, too. Jenna
is a good one. Actually you need two members to cure your
team in the first couple of rounds. You may think of Mercury
Adepts, but they are weak in this battle. Luckily, you can
change your dead members out so don't be too worried if someone
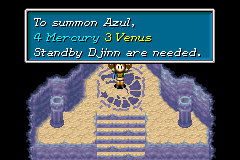
is downed. Let Garet standby 8 Mars Djinn, and change him
out when the green and blue balls are gone. Standby 3 Mercury
Djinn and 3 Jupiter Djinn as this summon, Koadri, will recover
your members' HP for four rounds. Standby Felix's and Isaac's
Djinn to get two Judgements. Don't forget: you should summon ONLY when the green
and blue balls are gone, or else your summons will have no effect
at all.
|
|
| You will receive a stone tablet in return. Leave.
|
|
|