|
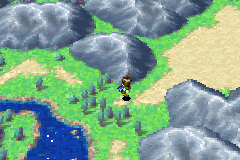
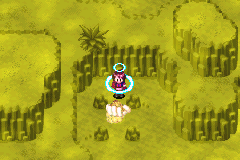
Yampi Desert
Click to see the full image:
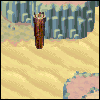
| After leaving the cliffs, follow the path east. When the path splits, take the southern path. Continue following the path. When you see a gap between mountains leading to a huge sand field, you will soon enter Yampi Desert.
|
 |
Click here to view
the map
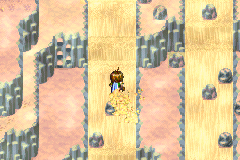
In the first screen, walk until you see a pillar, then turn south. Follow the path between the cliffs until you see a treasure chest. Pound the pillar blocking its way, and go get it. From there, go north and proceed to the next screen.
|
 |
Click here to view
the map
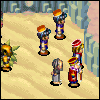
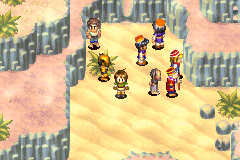
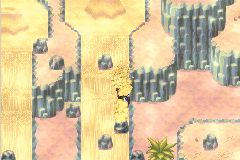
Here, you will meet the mayor of Alhafra, as well as some of the villagers. They seem to have trouble crossing the desert. Take the south path, and continue east to the next screen.
|
 |
Click here to view
the map
To get the Jupitar Djinni in this screen, you need to Pound the first pillar you can reach. From there, go north and turn east when possible, ignoring the 2 pillars you will encounter. Go further east and ignore the 2 consecutive pillars, as well as the one a little south of it. Continue east and Pound the pillar in between 2 rocks. Go all the way west to the end and get an antidote. There is a pillar north of the chest, but ignore this one. Back east a little and you see another pillar against the wall. Pound it. A rock ladder is hidden behind it. Climb up. Go west and jump across the pillar. Walk south along the cliff. Go east to where you see a slide. Jump across the pillar. On this ledge, pass the slide and immediately go south. Jump across the 2 pillars to the west. Walk south, then turn east and jump across the pillar. Now you are on the ledge where the Djinni is. Be prepared.
Battle:: This shouldn't be too hard if you know how to deal with the Djinni. First thing, avoid using Jupiter Psynergy and Summons. Unleash Venus and Mars Djinn on it. Venus Psynergy and summons have the advantage here. Use the summon Zagan, as well as Venus and Mars Psynergy, and you should finish this battle within the 2nd round if you are about level 9.
|
 |
|
Once you defeat it, the Djinni Blitz will join you. Now head west and jump onto the ledge. Slide down here. Walk west then north around this ledge. Go east when you see the 2 consecutive pillars. Go south when you see the pressed pillar, then a little east. Take the slide. Go east to the next screen.
|
 |
Click here to view
the map
Take the Psynergy Stone to restore all your PP. Pound the middle pillar and climb up. Go north to the next screen.
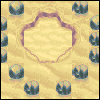
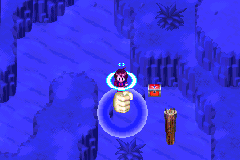
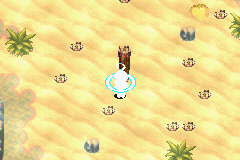
Before you do the puzzle here, set Pound as a hot key: go in your Psynergy menu, and move your cursor to Pound. Hold Select then press either L or R. This will set a shortcut key to either L or R (which ever one you choose). Whenever you press L/R, Pound will be activated. Back to the walkthrough. Your task here is to re-direct the moving scorpion to the way you want by Pounding the pillars and block its way.
Now go up to the only pillar. Wait until the scorpion is on the opposite side. When the scorpion is turning south, use Pound on the pillar. (See image.) It will run away. Follow it.
|
 |
Click here to view
the map
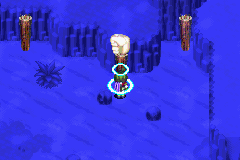
Here, go up to the only pillar again. Pound the pillar when the scorpion is moving east to the northeastern Pounded pillar. (See image.) This blocks its way and it moves north. Follow it.
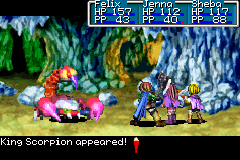
Go up to the first pillar you see. To get a better view of the puzzle, stand to the right to it. Again, watch the northeastern Pounded pillar. When the scorpion is a little bit before that pillar, Pound it. It will then move into the northern circle. Prepare yourself for a boss battle as you walk up to meet it.
|
 |
Click here to view the full strategy
Battle:: This is a tough battle. Use level 2 summons when possible. When someone's HP drops down to HP, you are in a danger zone, and at this point, you do not have Revive. Make sure you use Felix's Cure on that member. Only level 2 summons can do more than 120 damage. No other Psynergy can do this. Remember: this boss' weakness is Mars.
After the battle, you will get Scoop Gem. Equip it. Step back from the circle. Face it and use Scoop. Stand on the geyser to bring you back to the top.
|
 |
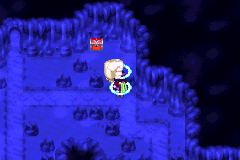
Go back past 2 puzzles screens. In this screen, go east and south to slide down. Go west and exit this screen. Go west and a bit south. Pound the pillar and go up the ladder. Go west until you leave this screen. Go south-west until you see 4 rocks forming a square. Scoop the middle circle. This reveals a hidden ladder. Go down.
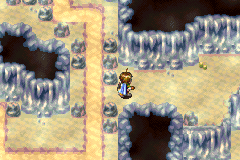
It is easy enough to go through the cave. You will soon find yourself outside again. Go east. Climb the rock ladder. Climb another one. Go west then climb down the rock ladder. The Alhafra villagers are there. Walk as close as you can get to them and they will spot you. They will thank you for finding the way for them. They will leave, and you have to go north.
Go east and south and Scoop the sand circle. This will give you some coins. Go north to the door.
|
 |
Click here to view
the map
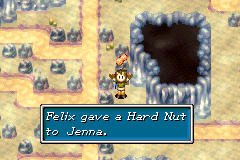
This sand puzzle will bring you to the direction it flows. You should hold B at all time. Walk on the first tunnel you see. It brings you north. When you see the hole from which all the sand is spewing out, run north out of the sand. Run across the tunnel flowing south. Go to the sand way east of you, that is also flowing south. Walk south until you are north of the sand flowing west. To get the treasure chest, walk on the sand and run up to the gap. Inside the chest is a Hard Nut.
Now go back to where you started and go north again. Run across the sand tunnel as you did before. Now go to the south-flowing current. Go up until you see 2 rocks blocking your way. Run across the sand tunnel to the east, then north to the rocks, then run back to the west again, then east again. You should now be on the dry land south of the treasure chest. Here it is a little tricky to Pound the pillar. Get carried away by the sand, and keep holding the up arrow. When you are in front of the pillar, Pound it. Whether or not you succeeded, let the sand bring you to the south to where you started on this second part. Go north to the ledge south of the treasure chest again using the same process.
|
 |
|
Now get the treasure chest. It is a Blow Mace, and it can be equipped by Felix and Sheba. I suggest you give it to Sheba, as if I am not mistaken, she is still holding a crappy weapon. Now get onto the sand and let it bring you south. Quickly run to the east when you see a gap formed by 3 rocks on top and 2 rocks on the bottom. Climb down the ladder and exit south.
|
 |
Click here to view
the map
In the next screen just go a little east then north to the next screen. Walk on the sand-fall and go down one level. Go east. Ignore the 9 rocks here. Keep going east and ignore another 9 rock formation. Walk to the end and climb up the rock ladder. Run west and pass 2 sand-falls. Head south and use Lash. Walk onto the sand and let it bring you down one level. Exit it east, and the treasure chest is in the south. This is another class changing item.
|
 |
|
Drop down the to the lowest level by taking the sand-fall. Go all the way back to the east to where you passed the 9 rocks and climb up again. Pass the 2 sand-falls again. This time take the north way. Climb up and pass one pumping sand. Run around the top of the next pumping sand to the east. Take the sand-fall to fall to the lower level. A rock will block your way. Safely run east and all the way to the north. Exit Yampi Desert.
|
 |
|